- Free delivery *

 Tip of the day
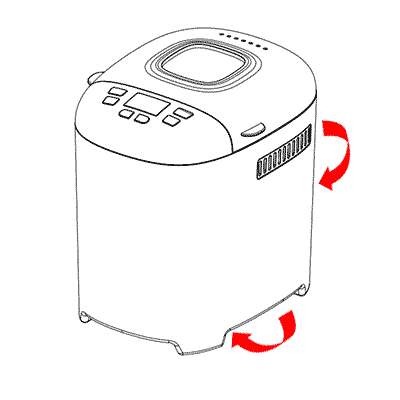
You need to know how to disassemble your PANASONIC bread maker in order to change the belt. In addition to the belt, you will also need to check that the malfunction of your machine does not come from the resistance. Loosen the screws on the back of the plate and remove the cover. The plastic hinges are turned in the opposite direction.
Check that the electrical mains is not heating up because of a resistor. Remove the screws under the resistor and check the condition of the resistor. If the malfunction of the bread machine PANASONIC is not due to the resistor, remove the screws that hold the internal housing, where the mixing container is attached. Check the condition of the belt. Remove a screw that is in the housing on the side where the housing is located. Then remove the top screws around the housing. In the horizontal part of the knob panel, you will find two round, black caps attached by two screws positioned below. These should also be removed. This will give you access to the belt.
Do not pull too hard when removing the tank as the resistors are attached to the board and could pull out a wire. Use a socket wrench. To reassemble the new belt for the PANASONIC bread maker, you must first go around the motor shaft and then around the wheel. Place as much of the belt as possible and then use your thumb to unhook it while turning the wheel.
If you start the Panasonic bread maker, the motor makes noise. You may also smell something burning, and your Panasonic breadmaker does not work properly It's time to change the belt, and it's cheap. It takes 15 minutes to replace a belt, and we ship all belts (poly-Vee, drive belt) within 24 hours.
 A young team trained
 Secure transaction
 Free shipping *
 Free returns and exhanches : satisfied or your money back for 15 days

Here are examples for partial reference for home appliances :
Where to find the reference?

